


The cylinders and, occasionally, motors, are where the rubber hits the road in a hydraulic gate system. Choosing the right size and mounting them up correctly will make your system work well or break your stuff. In this post we will go over the different options for cylinders and also talk little bit about motors.
The most common way to move the gate is with a cylinder. As we discussed in the post on the power source, a 1.5” cylinder is enough to move most gates. As for length, 12” to 16” is most common and it depends more on how the geometry of mounting the gates is looking, how far does it need to swing, and how are you going to mount the cylinder. The Surplus Center 9-4410-xx cylinder series works really well
One of the important things with mounting up hydraulic cylinders on gates is that you want to have a strong enough gate for it. You need strong hinges (I like sleeves over a round end of the gate on all gates). You also need a strong frame to the gate. I like to use a gate that has sch 40 pipe for the top rail when I know that the gate will be hydraulic. 14 gauge is too light and the tubes can break.
The next thing is to have mounts that are strong and also allow you to remove the gate relatively easily. This design works good for this series of cylinder. It spreads the load out along the gate, making it less likely to break off, and it also gives you an easy way to pin the cylinders in place. This lets you remove the cylinder to open the gate is your hydraulic system breaks down.
When you’re mounting the cylinder, use some vise grips to mount the brackets on your gate and post, then try it a few times. you want the cylinder to move the gate it’s full range of motion without hitting the end of the stroke, you want it to tighten up a little bit, that will keep it from stressing the mounts too much and also make it quieter when open or closed.

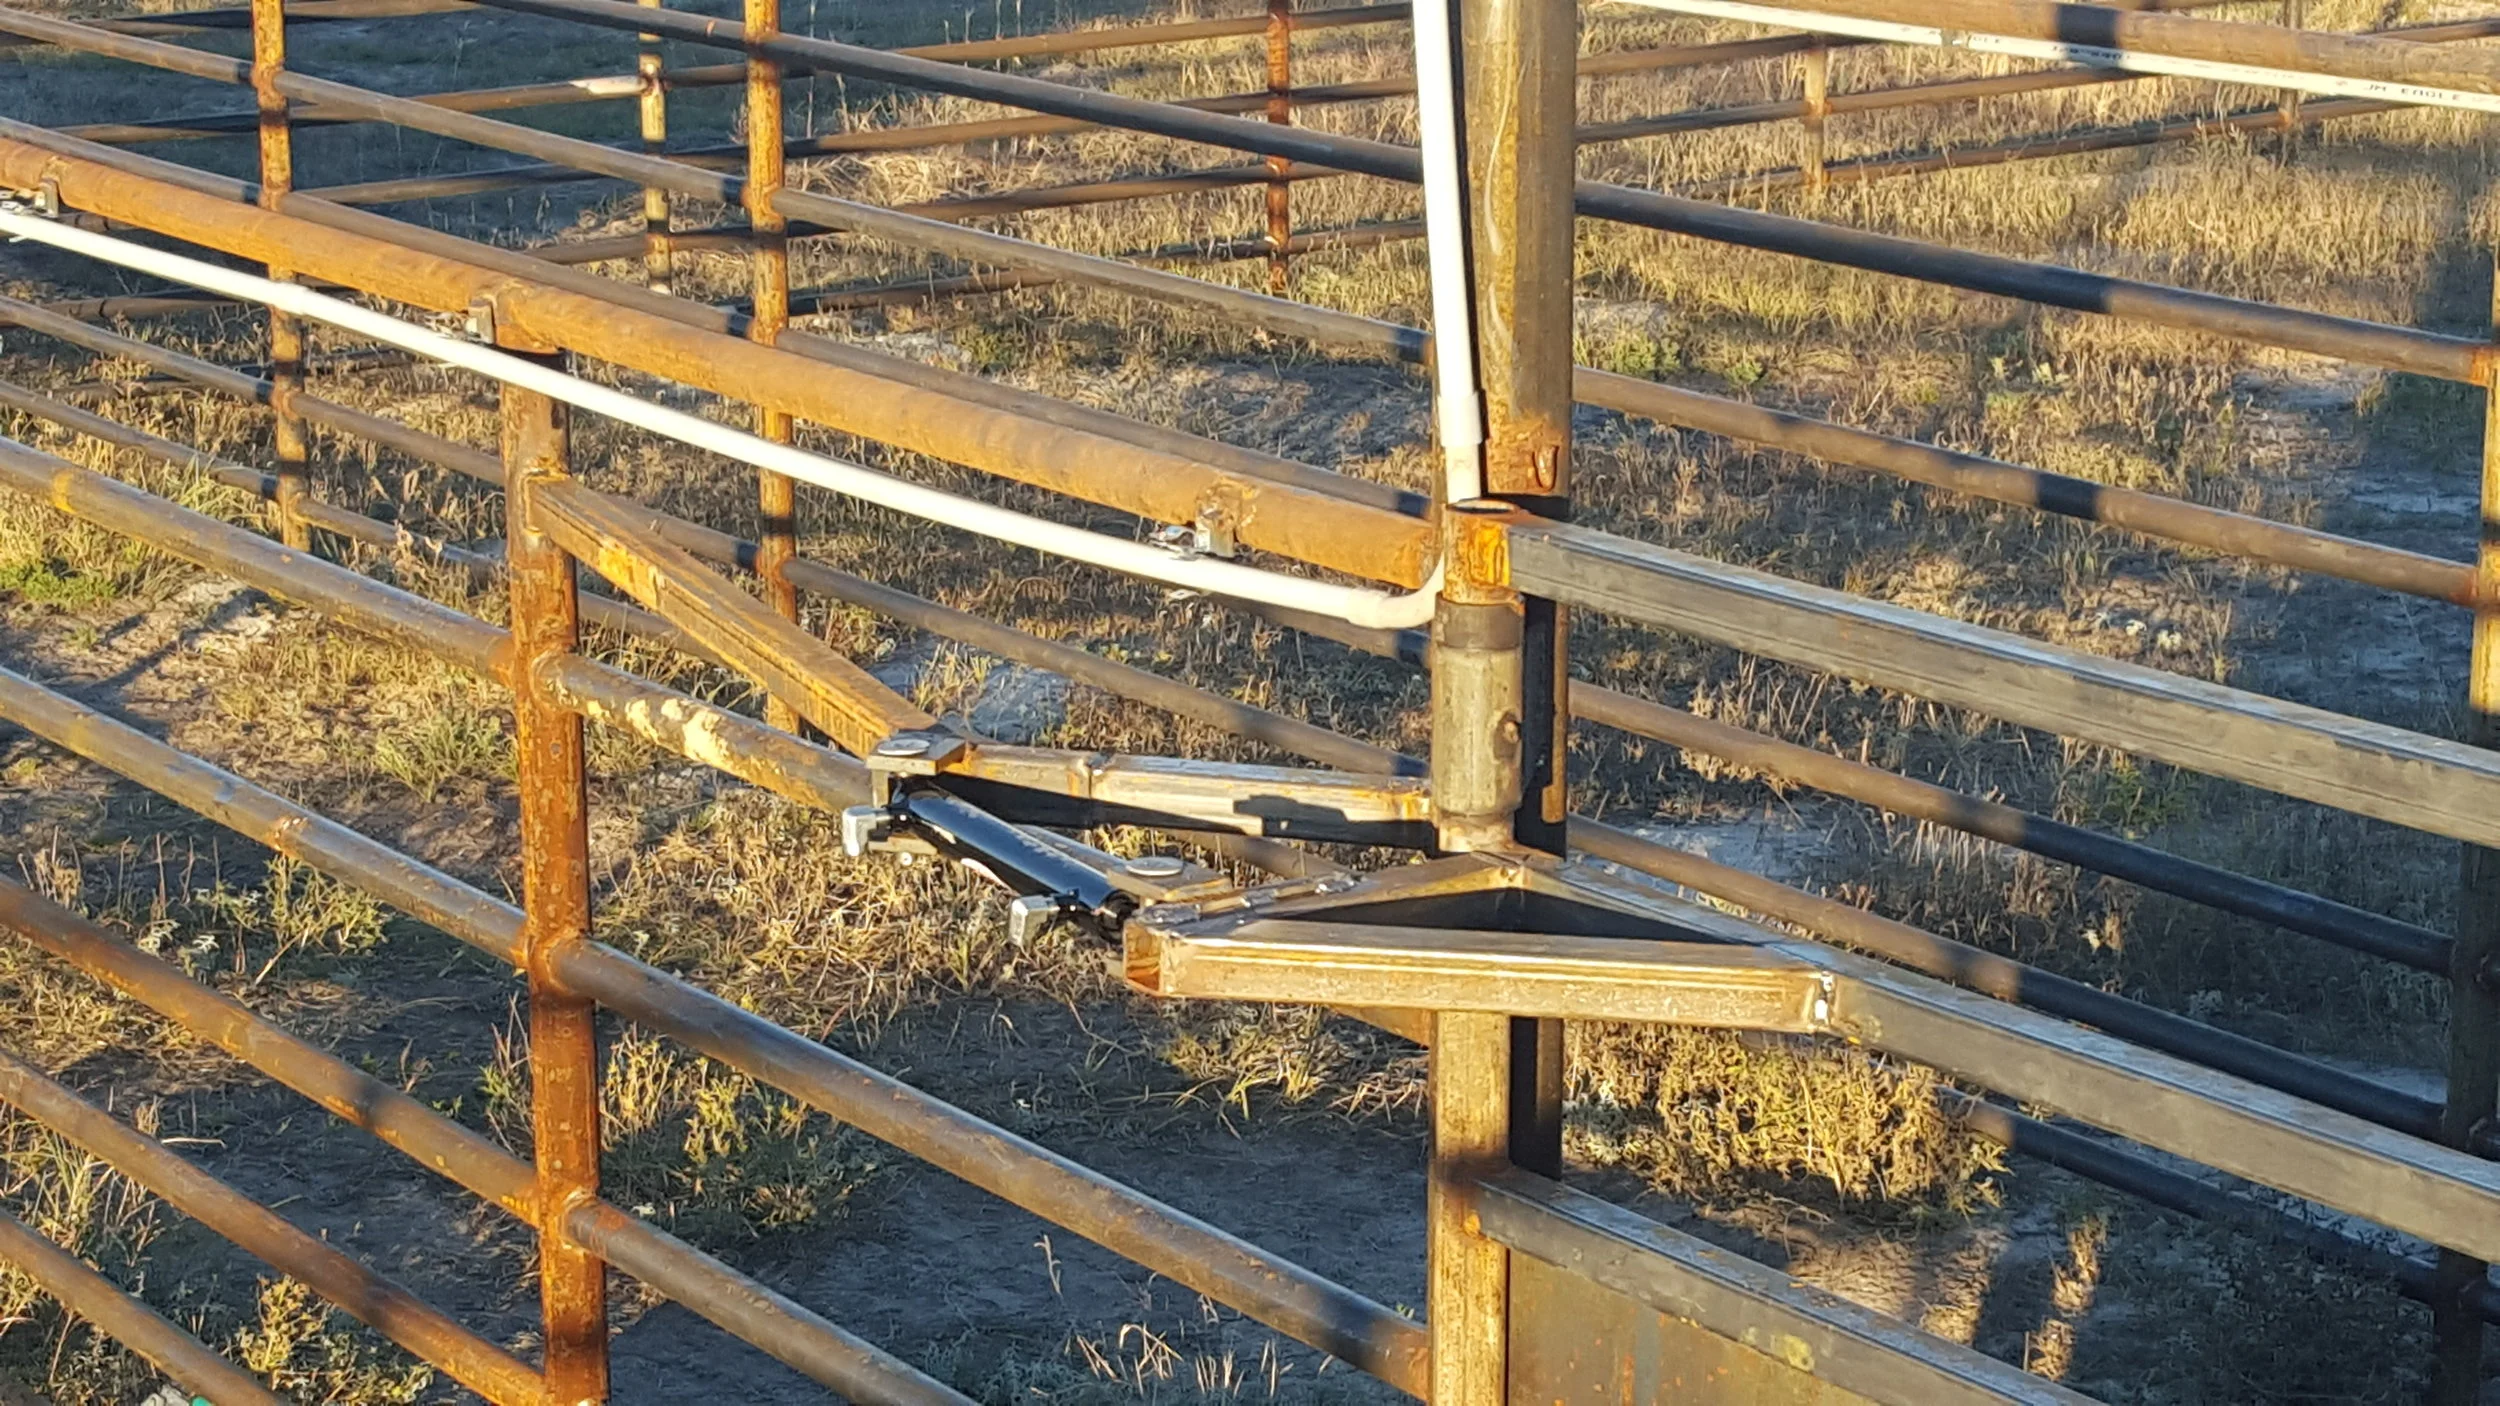
This mounting bracket is set thru a hole in the side of the post. This is very strong, but takes a lot of work and you don’t have a lot of room to adjust the angle.
The last thing to talk about is the bracing. There’s 2 ways I have done this. the first is to weld the pipe onto the side of the post, then run a brace back along the fence, either to the next post or to the heavy top rail. A picture of this system can be seen on the top of the page.
The other way is to blow a hole in the post, then stick the mounting tube thru the post and weld it that way. This is a far stronger system than just welding it to the side, so you don’t need to brace it back. When you do this system, I’d recommend using a heavy wall tube, 3/16” instead of 1/8” that you can use on the first system.
Finally, weld everything up and grind it off nice. These mounts are often at a height that a person or horse can hit them if you’re not careful, so clean it up nice and if you’re walking by it all the time, put some foam or rubber padding around the sharp end!
I’ll make a separate part on using hydraulic motors for driving gates as there’s a lot to cover on that, so stay tuned!

